
DIY Dragontail Whip
- Apr 26, 2017
- 3 min read

Who doesn't love a good whipping? Well, loads of people, but you're probably not one of them if you've ended up here.
A "dragontail" whip is a variation on a bullwhip, usually made with a strip of soft leather or rubber. If you're a beginner dom, start with something made of fabric until you have your technique and safety skills down pat. A dragontail is appropriate for intermediate level doms.
Getting Started:
There are a few things you need to decide before you get going, particularly handle and whip length. I chose 10" for the handle- it can be easily used with one hand, but there's room for two.
Whip lengths average between 3' and 4'. However long your whip, you will need double that space for your arch of action. If you have a 4' whip, you need 8' of space to use it. I started with 4' and ended up reducing it to 3', because my apartment is a far cry from Versailles.

Materials:
1" diameter wooden dowel (of desired handle length)
All purpose cement
Bike tire tubing (can be found used at bicycle repair shops)
2 nuts at 1" interior diameter
Fabric (for handle)
Upholstery tacks (not pictured)
Hot glue
Decorative peplum/ rope/ braiding
Tools:
Scissors
Hot glue gun
Brush (for cement)
Hammer
Marker

Prepping the Tail:
Cut the tube to make one long piece
Measure two inches from the bottom edge and mark it- this material will be used to attach it to the handle.
Measure at a 45 degree angle away from the base you have created. Mark along the tube.
Cut along the line you have created.
You'll notice a white powder as you start cutting. Most bike tubing has talc on the inside to prevent sticking. Wash off the talc with soap and water. Hang to dry.

While that's drying...

Weighting the Handle
If you want a wrist strap, cut it from your selected fabric. The strap pictured above is 20" by 1/2".
Shave away any excess wood to allow the nut to fit over the strap. It should still be a tight fit.
Paint the end of the handle with the cement. Be sure to do this in a well ventilated area.
Place both nuts over the strap ends and glue. (The nuts will give the handle heft that the wood alone cannot.)

Covering the Handle
Cut your selected fabric at a diagonal for wrapping. If you don't want a raw edge, go ahead and hem one side.
Paint the full length of the handle with cement.
Wrap the fabric as tightly as you can to prevent bubbling or folds.

Attaching the Tail
Take the 2" edge you left before and fold it in half.
Wrap it around the handle's end.
Secure the tail with upholstery tacks evenly spaced around the handle (I used 3).
Now, you could stop here. It looks well enough and it's completely functional.
However, if you want to add some embellishment, now's the time.

Decoration:
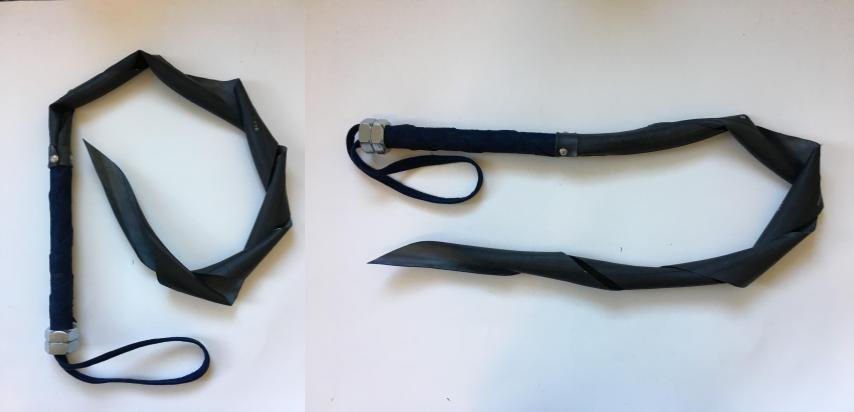
I have some scrap laying around from an old project, but really you can use anything you like the look of here. I used hot glue to attach peplum to the sides, then added braiding at the center. Here you can see the effect repeated on both ends.

And that’s it! Let everything dry, and you’ll have a fully finished whip. Enjoy!


Comments